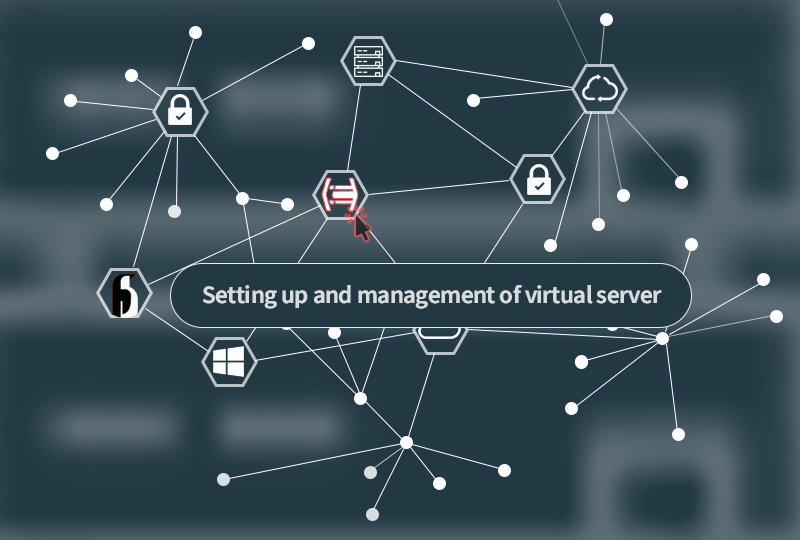
Virtual Server Setup: A Practical Guide to Streamline Virtualization

Sharma bal
Table of content
- 1. Setting Up Virtual Servers: From Bare Metal to Virtual Machines
- 2. Virtual server management: Optimizing Performance and Ensuring Stability
- 3. Network Security of virtual server/span>
- Conclusion
Virtualization has revolutionized IT infrastructure, offering agility and efficiency. This guide dives into the practical aspects of virtual server setup, providing a concise yet technical overview to streamline your virtualization journey. We’ll cover crucial hardware considerations, step-by-step hypervisor installation with VMware as a detailed example, and essential initial configurations to get your virtual world running.
1. Setting Up Virtual Servers: From Bare Metal to Virtual Machines
Virtual server setup start with creation, which involves careful planning and execution. Think of it as building a house – a solid foundation (hardware) is critical before constructing the rooms (virtual machines). This section outlines the essentials, moving from hardware prerequisites to hypervisor deployment.
1.1 Hardware requirements
Choosing the right hardware is not just about meeting minimum specs; it’s about ensuring optimal performance and scalability. Hardware requirements for virtualization vary based on your platform (VMware, Hyper-V, KVM, etc.) and workload, but some core considerations are universal:
CPU (Processor): Multi-core Powerhouse with Virtualization Extensions
- For robust virtualization, prioritize CPUs with a high core count. Modern CPUs often feature Intel VT-x or AMD-V extensions – these are essential for hardware-assisted virtualization, significantly boosting VM performance. Statistically, servers with virtualization extensions can see up to a 30-40% performance improvement in virtualized workloads compared to those without. Check your CPU specifications meticulously. For example, Intel Xeon Silver or Gold series CPUs are commonly used in virtualization environments due to their core counts and virtualization feature support.
Memory (RAM): Ample and Fast
- RAM is the lifeblood of VMs. Insufficient RAM leads to performance bottlenecks and sluggish VMs. Allocate at least the combined RAM required by all VMs you plan to run simultaneously, plus overhead for the hypervisor itself. Consider DDR4 or DDR5 ECC RAM for enhanced reliability and error correction, crucial in server environments. Industry best practices often recommend starting with at least 32GB of RAM for a basic virtualization host, scaling upwards based on the number and resource demands of your VMs.
Storage: Speed and Redundancy are Key
- Storage performance directly impacts VM responsiveness. Solid State Drives (SSDs) are highly recommended over traditional Hard Disk Drives (HDDs) due to their significantly faster read/write speeds. SSDs can improve VM boot times and application loading by up to 5-10x compared to HDDs. For redundancy and data protection, consider implementing RAID configurations (e.g., RAID 1, RAID 5, RAID 10). Choose storage capacity based on your OS, application, and data storage needs, planning for future growth.
Network: Gigabit Ethernet and Beyond
- Networking is the communication backbone. Gigabit Ethernet (or 10 Gigabit Ethernet for demanding workloads) is essential for virtualized environments. Multiple Network Interface Cards (NICs) improve performance and enable network segmentation for enhanced security and traffic management. Consider features like NIC teaming for redundancy and increased bandwidth.
Hypervisor Compatibility
- Always consult the official hardware compatibility list (HCL) of your chosen hypervisor (VMware HCL, Hyper-V documentation, KVM/Xen community resources). Ensuring hardware compatibility prevents driver issues and performance problems down the line.
GPU (Optional but Powerful)
- For graphically intensive workloads (VDI, certain applications), a dedicated GPU with support for GPU pass-through can dramatically improve VM performance. NVIDIA vGPU and AMD MxGPU are common technologies for virtualized GPU acceleration.
1.2 Installing and Configuring Hypervisors
The foundation of a thriving virtual server environment lies in the proper installation and configuration of hypervisors. This crucial step involves selecting, installing, and fine-tuning hypervisors such as VMware, Hyper-V, KVM, and Xen. You can choose among these for your work purpose, but we covered setting up VMware as an example here:
1.2.1 Steps to Install and Configure VMware for Virtual Server setup
VMware ESXi is a bare-metal hypervisor, installed directly onto your server hardware. Follow these steps for a smooth installation:
- Download VMware ESXi ISO: Obtain the latest ESXi ISO image from the official VMware website. You’ll likely need a VMware account. Choose the version compatible with your hardware.
- Create Bootable Media: Burn the ISO image to a USB drive or DVD. Tools like Rufus (for USB) are commonly used. Ensure the media is bootable.
- Boot from Installation Media: Insert the bootable media into your server and power it on. Access the BIOS/UEFI settings (usually by pressing DEL, F2, or F12 during startup – consult your server manual) and configure the server to boot from the USB/DVD drive.
- VMware ESXi Installer: The ESXi installer will launch. Follow the on-screen prompts.
- Disk Selection: Choose the disk where you want to install ESXi. Best practice is to dedicate a separate drive (SSD recommended) for the hypervisor installation for optimal performance and isolation.
- Root Password: Set a strong root password for the ESXi host. This is crucial for security.
- Network Configuration (Initial): Configure a basic network setup during installation. You can refine networking later. Assign a static IP address if possible for easier management.
- Installation Completion and Reboot: The installer will copy files and configure ESXi. Upon completion, reboot the server.
- Access ESXi Host: After reboot, ESXi will display its IP address on the console. Use a web browser from another computer on the same network to access the ESXi host management interface using the IP address. Log in with the root password you set.
Post-Installation Configuration (Essential):
- Networking: Configure virtual switches (vSwitches), port groups, and VLANs as needed for your virtual network architecture.
- Storage: Create datastores on your chosen storage devices (SSDs, SAN/NAS) to store VM files.
- User Management: Create additional user accounts with appropriate roles for delegated administration.
- Security Hardening: Implement security best practices, such as enabling firewall rules, configuring access controls, and enabling SSH only if necessary and securing it.
- VMware Tools: Install VMware Tools within each VM you create later. This suite enhances VM performance, improves graphics, and enables features like shared folders and clipboard.
For detailed information and alternative hypervisor installation guides, refer to the official documentation of VMware, Hyper-V, KVM, or Xen. Explore resources like”Most popular Virtualization Platforms” for hypervisor comparisons to make an informed choice. .
2. Virtual server management: Optimizing Performance and Ensuring Stability
Effective virtual server management is an ongoing process, crucial for optimizing server performance and maximizing the benefits of virtualization.
2.1 Virtual server Lifecycle
Understanding the VM lifecycle is paramount for efficient resource allocation and maintaining a healthy virtual environment. The typical VM lifecycle stages are:
Creation
Creating a VM involves defining its resources (CPU, RAM, storage, network), choosing an OS template or ISO, and configuring initial settings within the hypervisor interface. Automated VM provisioning tools can significantly speed up this process, reducing deployment times by up to 70% in large-scale environments.
- Deployment: Deploying the VM involves powering it on and making it accessible on the network.
- Configuration: Post-deployment, configure the guest OS, install necessary applications, and customize settings to meet specific workload requirements.
- Operation: The VM is actively running applications and services. Continuous performance monitoring is critical in this stage. Tools within your hypervisor (e.g., VMware vCenter, Hyper-V Manager) provide real-time metrics on CPU usage, memory consumption, network traffic, and storage I/O. Proactive monitoring and right-sizing VMs based on actual resource usage can lead to 15-25% average resource optimization in virtualized environments.
Monitoring and Maintenance
Regularly monitor VM health and performance metrics. Implement scheduled maintenance tasks like OS patching and application updates to ensure security and stability. Use hypervisor monitoring tools and consider integrating with centralized monitoring solutions for comprehensive visibility.
- Backup and Snapshotting: Implement a robust backup strategy. Regular VM backups are crucial for disaster recovery. Snapshots provide point-in-time recovery for quick rollbacks before software updates or configuration changes. Utilizing VM-aware backup solutions can reduce backup windows by up to 50% and improve recovery times.
- Scaling: Dynamically adjust VM resources (CPU, RAM) based on changing workload demands. Hypervisors offer features like live migration to move running VMs between hosts without downtime for maintenance or resource balancing.
- Updates and Patching: Keep both the hypervisor and guest OSs updated with the latest security patches. Automated patch management tools can reduce vulnerability windows by up to 80% compared to manual patching processes.
- Migration and Live Migration: Utilize live migration for load balancing, hardware maintenance, or disaster avoidance. This minimizes downtime and ensures business continuity.
- Decommissioning: When a VM is no longer needed, properly decommission it to reclaim resources. This involves shutting down the VM, deleting its files from storage, and updating inventory records. Proper VM decommissioning is essential for efficient resource utilization and avoiding “VM sprawl,” which can lead to wasted resources and management complexity.
2.2 Snapshot and cloning
- Snapshots capture a VM’s state at a specific moment. Use them before making significant changes (software installations, updates) to create a rollback point. If something goes wrong, you can quickly revert to the snapshot, minimizing downtime. However, snapshots are not backups and are not designed for long-term data protection. They are primarily for operational recovery within a short timeframe.
- Cloning creates an identical copy of a VM. This is invaluable for rapid deployment of multiple VMs with the same configuration, such as in test/development environments or scaling out web servers. VM cloning can reduce VM deployment time from hours (manual configuration) to minutes, significantly accelerating infrastructure provisioning.
3. Network Security of virtual server
Security considerations within virtual server setup process is paramount. Virtual servers often share the same physical infrastructure, making robust network security even more critical. Key measures include:
- Monitoring and Logging (Security Focus): Implement security-focused monitoring and logging. Collect security logs from hypervisors, VMs, firewalls, and IDPS. Analyze logs for security incidents and anomalies.
- Virtual Network Segmentation (VLANs): Segment your virtual network using VLANs to isolate traffic between different VM groups (e.g., web servers, database servers, application servers). This limits the impact of a security breach.
- Virtual Firewalls: Deploy virtual firewalls to control traffic flow between VLANs and at the perimeter of your virtual network. Define strict firewall rules based on the principle of least privilege. Next-generation firewalls (NGFWs) offer advanced features like intrusion prevention (IPS) and application-level filtering, providing enhanced security for virtual environments.
- Network Encryption (VPNs, TLS/SSL): Encrypt network traffic, especially sensitive data in transit between VMs and external networks. Use VPNs for secure remote access and TLS/SSL for securing web traffic.
- Intrusion Detection and Prevention Systems (IDPS): Implement virtual IDPS solutions to monitor network traffic for malicious activity and automatically block or alert on threats.
- Micro-segmentation: For advanced security, consider micro-segmentation within VLANs to isolate individual VMs or applications, further limiting the attack surface.
- Access Controls and Identity Management: Implement strong authentication and authorization mechanisms. Use role-based access control (RBAC) to restrict administrative access to virtual infrastructure components.
- Security Policies and Auditing: Define and enforce clear security policies for virtual environments. Regularly audit security configurations and logs to identify and address vulnerabilities. Implement security information and event management (SIEM) systems for centralized security monitoring and incident response.
- Hypervisor Security Hardening: Secure the hypervisor itself. Apply hypervisor security patches promptly. Restrict access to the hypervisor management interface. Disable unnecessary services. Follow hypervisor vendor security hardening guides.
- Regular Updates and Patch Management: Maintain a rigorous patch management process for both hypervisors and guest operating systems. Unpatched vulnerabilities are a leading cause of security breaches. Automated patch management is highly recommended for virtualized environments.
Conclusion
In conclusion, the article sheds light on the intricate process of setting up and managing virtual servers, emphasizing their pivotal role in modern IT infrastructure. The initial focus on hardware requirements underscores the importance of a robust foundation to support virtualization, paving the way for hypervisors’ subsequent installation and configuration. The detailed steps provided for VMware deployment offer practical insights into the intricacies of virtual server deployment. Moving beyond the setup phase, the article delves into the dynamic realm of virtual server management, addressing the complete lifecycle from provisioning to decommissioning. Including snapshotting and cloning as critical tools in the management toolkit highlights their utility in backup, testing, and scalability scenarios.
The second central theme of the article revolves around the critical aspect of network security in the virtual server landscape. Recognizing the shared physical infrastructure in which virtual servers operate, the article advocates for robust security measures. In essence, the comprehensive guide provided in the article emphasizes the importance of virtualization in contemporary IT. It equips readers with practical knowledge to navigate the complexities of virtual server deployment, management, and security in today’s rapidly evolving digital landscape. For more details or any help, please reach us at Hostomize. Our team of experts can walk you through your issues and help you chose the suitable solutions for your needs.